FMB Turbo 20-100 Channel Change
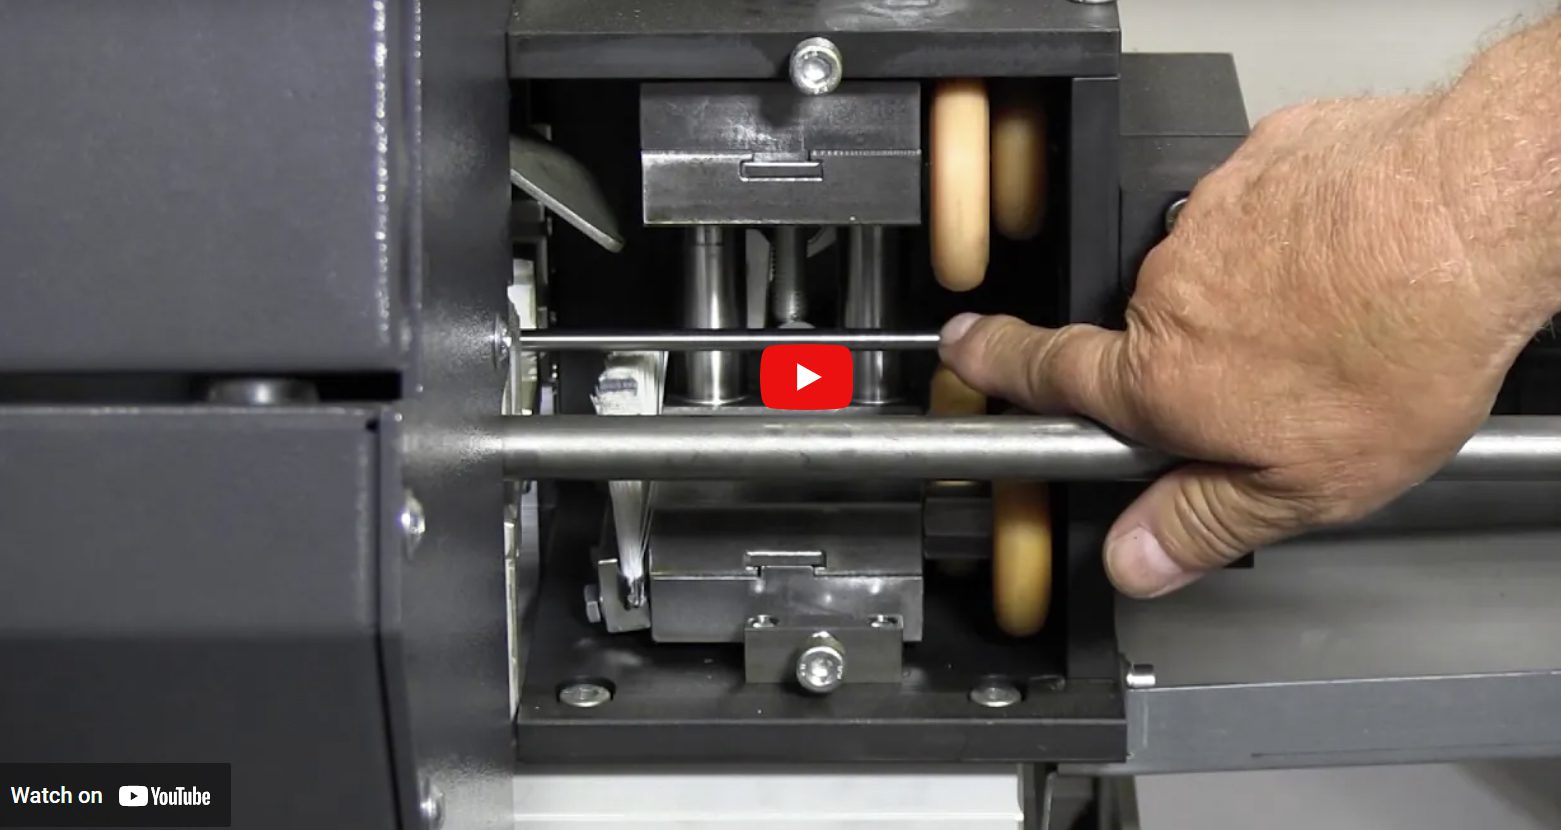
Today we’re going to take a look at doing a channel change on an FMB Turbo 20-100. Process is relatively simple. It consists of moving the pusher and 16 channel pieces. There’s seven here on the top and nine with the remnant flap on the bottom. We’ll get started. The tops are simple. We’re going to let gravity do most of the work. So, I’m going to pull this piece out simply by turning the retention knob. Once the channel piece is out, you’ll replace it with the exact same length piece of the new set of channels. No worries about getting confused of getting them in backwards. There’s a profile here that will let this only go in one way. So, we’ll return this back into place and we’ll turn the retention knob 180° to lock it.
Okay, we’re halfway there. We’re going to work on the bottoms. The bottoms are also just as easy. There’s a retention knob here, like a little hockey puck. We’re going to remove that with a ball detent. Lift those channel pieces out. Same scenario, one-sided profile. Replace it with the same length channel piece. Put it back in.
The bottoms have one more step. There’s a set screw here located on the side that you’ll want to tighten down to securely lock this in once completed. Okay, there’s one more final phase of this channel changeover. I’d like to show you a great feature we have, and that’s the ability to remove this heavy 80 mm pusher in this machine. That thing’s several hundred lbs. The bar feeder with the push of one button called Conversion Mode allows us from the HMI simply to have the pusher travel forward, make sure that all the material is clear, and then lift it out of the channel set, making it easy to remove by hand.